Crazy Egg: JavaScript Installation

Project Overview
A case study on how I redesigned the JavaScript installation process for Crazy Egg.
Credit
I worked closely with the amazing Sarah Thomson who crafted the hand-drawn illustrations and helped contribute to the overall visual design direction
Contributions
I lead a team to research, design and implement this in 1.5 months. My key contributions included:
  • Lead Product Designer, Product Owner
  • UX Researcher
  • Interaction Design
  • Prototyping
  • Visual Design

Goal

Our goal for the project was to revamp the installation process. The premise was simple: install the Crazy Egg tracking script, track click data.
The high-level goals included:
01
Install JavaScript faster

Make it fast and easy-to-use for marketers to install their JavaScript code snippet.


02
Increase user confidence

Increase users' confidence by limiting and managing users' time spent floating in limbo.


03
Improve UI with more feedback

Increase the feedback loop where completed tasks are reciprocated with success states.


JavaScript Installation Flow: Before & After

Here are before and after shots of the Snapshot Creation flow interface.


Before
After

Process

Without pre-existing insights, I interviewed customers to understand how Crazy Eggers were installing the code snippet.
EARLY INSIGHTS FROM USABILITY TESTING
I tested the existing installation flow with 8 participants. The goal was to understand the challenges Crazy Egg users faced.
Issue #1: Crazy Egg users were annoyed when they were dropped straight into the installation page after creating their first heatmap report. They expected to see a confirmation page after they created their first heatmapreport.

Issue #2: Users were confused by a lack of feedback because they weren't sure if they successfully installed the JavaScript code snippet. They expected a success-confirmation within their dashboard after they finished going through the installation flow.

MAPPED OUT TOUCHPOINTS

I mapped out each touchpoint and analyzed what worked well and what didn't work well.
I was mindful of what our users were pursuing at each step so that I can help shape their expectations for the next one.

Sketches

Task Flow

In addition to the sketches, I created a flow chart that served as an artifact to align the team on the scope of the project.
The flow chart also provided our team of engineers a high-level understanding of the multiple flows. In addition, the task flow helped our remote team dig into the weeds of specific states and ensure there were no dead-ends.

UI Flow & Wireframes

I created low fidelity wireframes to focus on the copy, information architecture, layout, and flow.
I explored multiple design approaches in the form of a low fidelity interactive prototype. I discussed with the team the strengths and weaknesses of each approach, and iterated based on internal feedback.

Final Designs

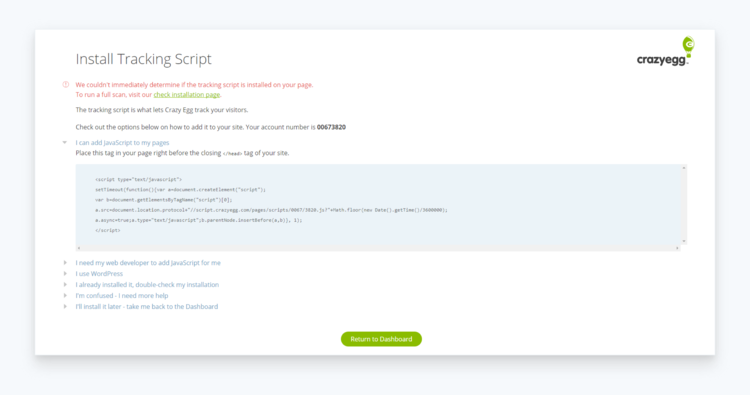
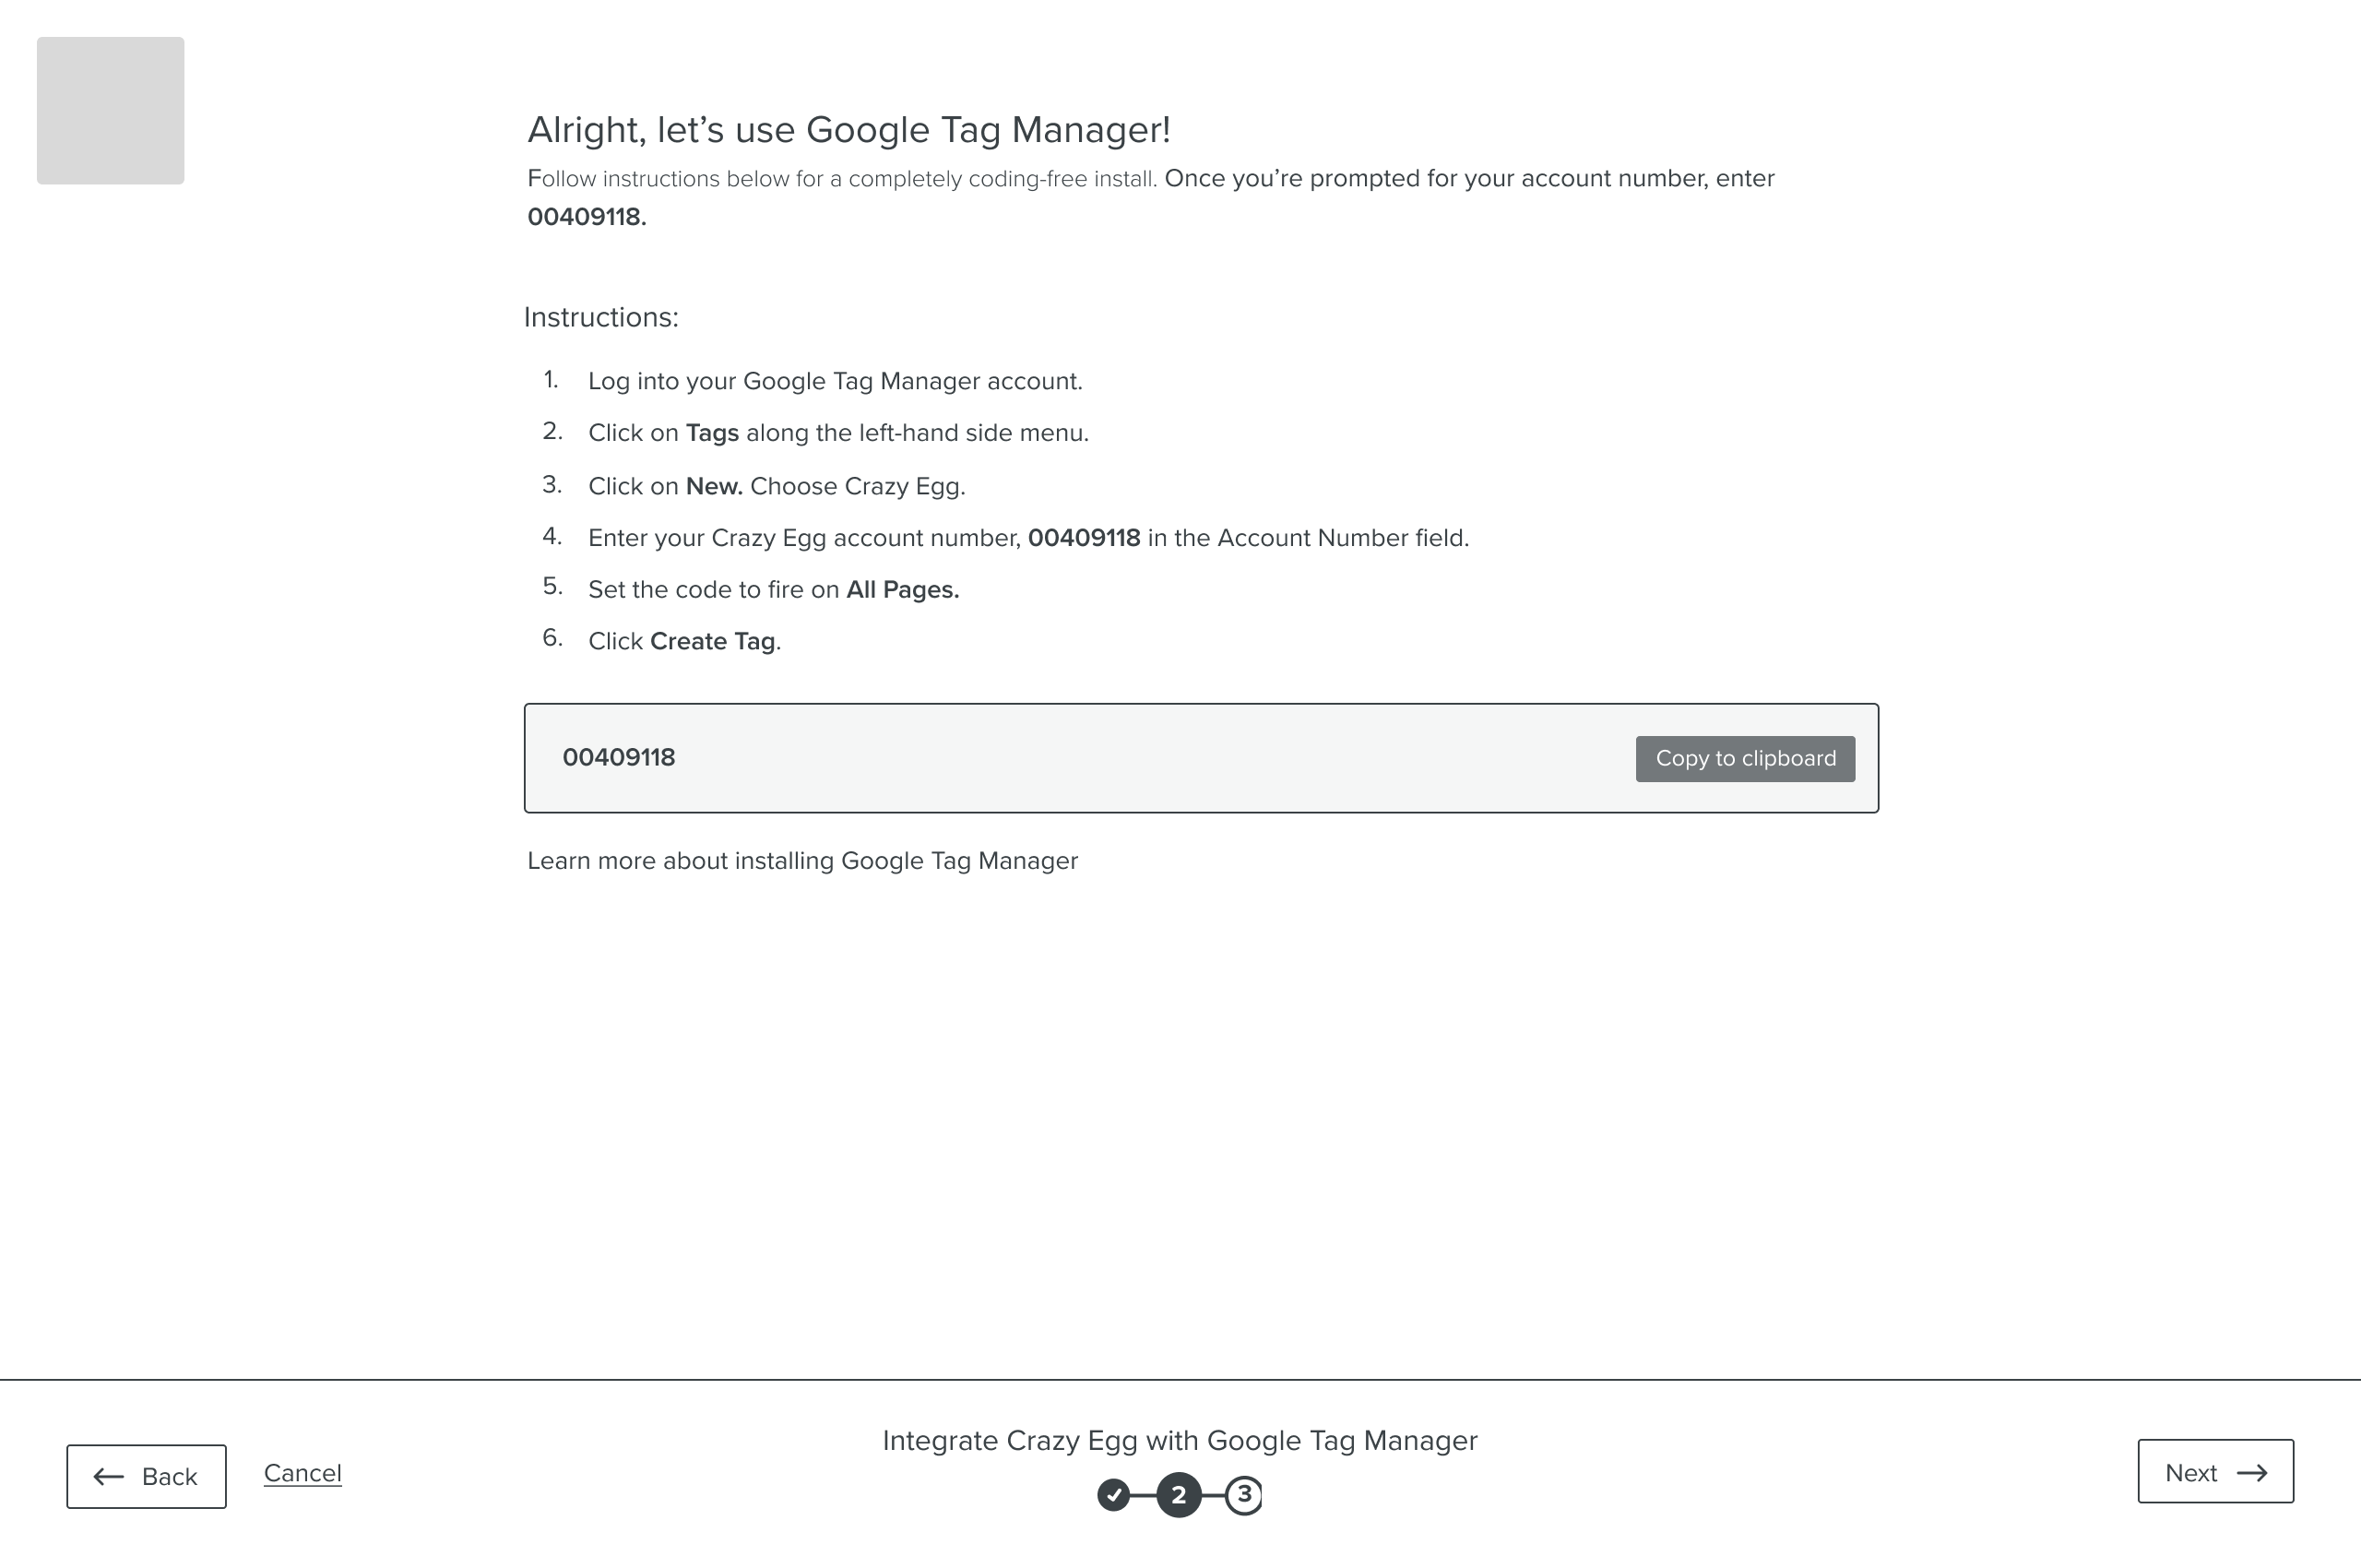
Visual Design: I worked on the visual treatment to align it with our brand. We iterated on how to draw users' attention to the different installation options and how to use the space effectively.
Specifications for Development: I created a specification document that was used to cover each touchpoint within the flow, hover states, and micro-interactions. This document, along with a red-lined visual specification I created, helped our remote engineering team reference the specifics of the design during the implementation phase.
Development Oversight: I worked with a team of engineers to answer questions and tweak designs to ensure that the new installation process worked and looked as expected.

Customer Feedback (after release)